
Please note that some of the links on this site are affiliate links and we earn from qualifying purchases. This does not cost you anything extra, but it helps us keep the lights on. Thank you for your support!
Glock handguns are renowned for their reliability, durability, and simplicity. Yet, every aficionado knows that there’s always room for improvement, a pathway to tailor your handgun to suit your unique needs and preferences. One very common and simple way to achieve this is through upgrading the trigger system to enhance the performance and shooting experience.
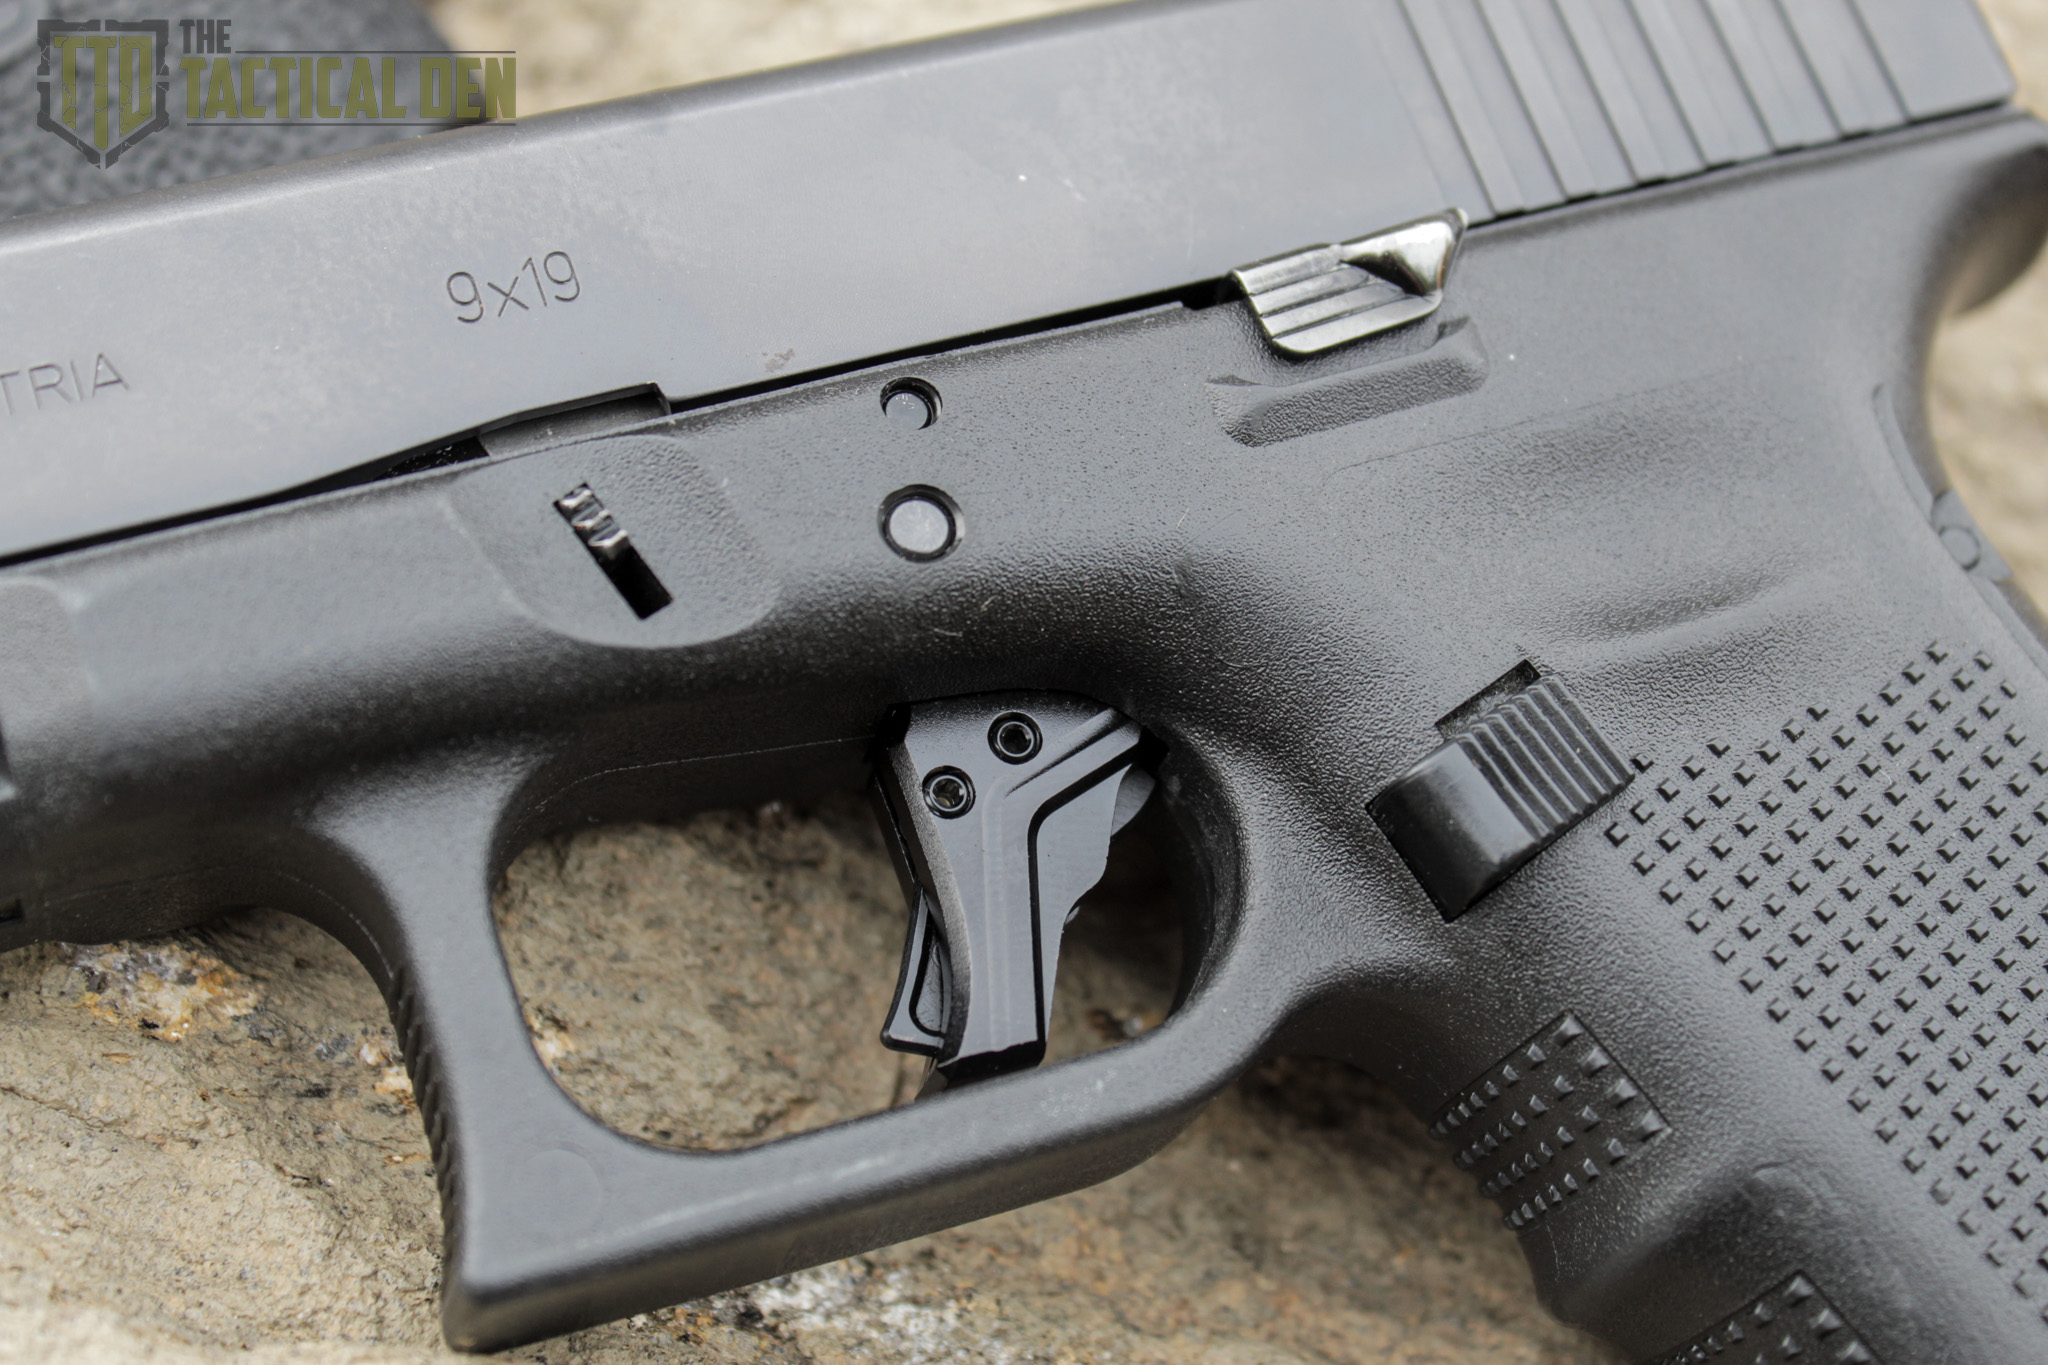
Today, we’re diving into a detailed step-by-step guide on installing the Tyrant I.T.T.S. – Glock Gen 3-4 trigger with trigger bar into our gen 4 Glock 17. While this guide focuses on the Glock 17, these steps can be applied to other Glock models as well. Tyrant CNC, renowned for their innovative and precision-engineered products, doesn’t just offer an aesthetic edge with this trigger—it’s a genuine boost to your shooting experience.

Why we opted for the Tyrant I.T.T.S? Beyond its sleek design, it promises a smoother, lighter, and highly tactile reset. This advanced trigger system offers unparalleled control, making shooting both sensitive and assertive. Its user-friendly installation process ensures both seasoned shooters and novices find value in its design. On top of all that the price point is amazingly affordable with Tyrant I.T.T.S. trigger coming in at $74.95, Huge bang for your buck!
Join us as we upgrade our gen 4 Glock 17 to a more proficient, responsive, and aesthetically pleasing piece through the installation of the Tyrant I.T.T.S. – Glock Gen 3-4 compatible trigger w/ trigger bar. Let’s elevate your Glock’s potential to unprecedented heights!


Safety and Tools Needed
Before we dive into the exciting process of upgrading our gen 4 Glock 17 with a Tyrant I.T.T.S. trigger, it is paramount to prioritize safety and ensure that you are equipped with the necessary tools for a smooth installation. Here is a detailed breakdown of what you will need:
Safety Precautions:
- Unloaded Firearm: Always start with an unloaded firearm. Double-check to ensure that the chamber is empty and that there are no rounds in the magazine.
- Safe Environment: Work in a clean and well-lit environment, free from distractions to focus solely on the task at hand.
- Safety Gear: Although not mandatory, it is advisable to have safety glasses on to protect your eyes from any unexpected situations.
Tools Needed:
- Punch: This tool will be used to remove pins and to assist in the precise placement of components during the installation process.
- Hammer: A small hammer can be used in tandem with the punch to drive pins in and out as necessary. But not needed, all pins in this guide were removed from just using a little elbow grease and a punch
- Bench Block: Essential for holding your Glock steady, a bench block will provide a secure surface to work on, preventing any damage to your working surface and your Glock.

With safety as our priority and the right tools at our disposal, we are set to undertake this upgrade, bringing a significant performance enhancement to your gen 4 Glock 17. Stay tuned as we delve into the step-by-step guide in the upcoming section, guiding you through a successful installation process with ease and precision.
Disassembly
Step 1: Safety Checks
Start by ensuring the gen 4 Glock 17 is unloaded. Remove the magazine and visually inspect the chamber to confirm it is empty and safe to work on.

Step 2: Removing the Slide
Hold the slide slightly back with one hand and using your other hand, pull down the takedown bar on both sides of the frame. Once done, release the slide, pull the trigger (ensure the firearm is clear), and push the slide forward removing it from the frame.


Step 3: Locking Block Pin Removal
Position your Glock on the bench block. Using the punch, push the pin out of the frame to remove the locking block pin.

Step 4: Trigger Pin Removal
Using the punch and bench block, push the trigger pin out from the right side to the left. Wiggling the slide stop and the trigger can aide the removal of this pin.

Step 5: Slide Stop Removal
With the trigger pin out, you can now easily remove the slide stop and spring. Set it aside.

Step 6: Rear Pin Removal
Focus on the rear of the grip and use the punch and bench block to remove the rear pin. This one can be a tighter fit then the others if need use the help of a hammer with this one but most of the time its not needed.

Step 7: Removing the Locking Block
Next, remove the locking block, utilizing pliers if necessary to remove it.

Step 8: Trigger Assembly Removal
Lift out the entire trigger assembly from the frame.

(NOTE: Now is a great time to clean inaccessible parts of the frame and components.)
Step 9: Disassembling the Trigger Assembly
Finally, to remove the trigger bar from the plastic housing, twist the trigger bar to the side just enough to release the tab from under the plastic lip releasing if from the plastic housing. Next flip the trigger and bar over then detach the spring that connects it to the housing.


(Note: If you’re replacing the connector and spring, this would be the time, although this guide doesn’t cover that process.)

Reassembly
Step 1: Reassembling the Trigger Assembly
If you opted to replace the spring and connector, start by installing them (Note: this guide doesn’t cover the replacement process). Hook the spring to the trigger bar and flip it back down to prepare it for installation into the housing. Twist the bar slightly to the side to get the metal tab under the plastic lip of the housing.


Step 2: Installing the Trigger Assembly into the Frame
Next, guide the trigger through the frame’s trigger hole, and position the rear of the assembly into the frame’s rear section. Ensure its full seated in place.

Step 3: Locking Block Installation
Proceed with reinstalling the locking block. Align it properly with the frame’s pin hole before pressing it firmly into position.

Step 4: Rear Grip Pin Installation
Install the rear grip pin by hand using a punch, pushing it back into the grip and securing the trigger assembly’s rear part in place.

Step 5: Reinstalling the Slide Stop and Spring
Now, reinstall the slide stop and its spring, making sure to align them with the trigger pin hole. You can use a punch through the trigger pin hole to ensure the holes are aligned.

Step 6: Installing the Trigger Pin
Reinstall the trigger pin from the left to the right, pushing it in by hand. You might need to wiggle the slide stop and trigger slightly to fully seat this pin.

Step 7: Locking Block Pin Installation
Moving forward, reinstall the locking block pin, preferably by hand using a punch, to secure the locking block in its position.

Step 8: Reattaching the Slide
Align the slide rails properly and pull back the slide until the takedown bar locks it back in position.

Step 9: Functionality Check
As a final step, conduct a functions check to ensure that every feature is working smoothly and correctly. It’s essential to verify that all components have been installed correctly to guarantee the firearm’s safe operation.

Testing the Trigger
After meticulously following the disassembly and reassembly process, it is time to test the newly installed Tyrant I.T.T.S Glock Gen 3-4 Trigger to ensure its proper function and to feel the difference it brings to your gen 4 Glock 17.
Dry Firing: Begin with a dry firing test. Make sure the firearm is clear and safe and pointed in a safe direction, then proceed to pull the trigger. Feel the weight, the reset, and the overall smoothness. It’s vital to get a sense of the trigger’s performance in a controlled environment first.
Live Firing: Its time to head to the range for a live firing test. It is here that you will truly get a feel for the improvements the Tyrant I.T.T.S. trigger brings to your Glock. Note the differences in your shooting experience, focusing on the trigger’s response and the fluidity of your shots.
Detailed Review
For enthusiasts looking for a deep dive into the intricacies of the Tyrant I.T.T.S Glock Gen 3-4 Trigger, we have prepared a comprehensive review. You can access the full details, insights, and our hands-on experience in the full review (COMING SOON).
Conclusion
Installing a new trigger system in your Glock is a decisive step towards enhancing its performance and potentially revolutionizing your shooting experience. With the Tyrant I.T.T.S Glock Gen 3-4 Trigger proves this by bring a new level of performance and reliability to your gen 4 Glock 17.
As you test your newly installed trigger, you may notice significant improvements in your shooting experience. Smooth trigger pulls, enhanced control, and possibly a more enjoyable time at the range are just a few of the benefits you might reap from this upgrade.
Thank you for following along with our step by step installation guide. We wish you a safe and satisfying shooting experience with your upgraded Glock. Remember, safety should always be your paramount concern, and maintaining a responsible approach to firearm modification is essential.


Leave a Reply